How to create catalog icons on IMVU – part 1
![]() If you are new to creating, or want to improve your catalog icons, here are some basic tips on how to take clear, sharp photos for your IMVU products.
If you are new to creating, or want to improve your catalog icons, here are some basic tips on how to take clear, sharp photos for your IMVU products.
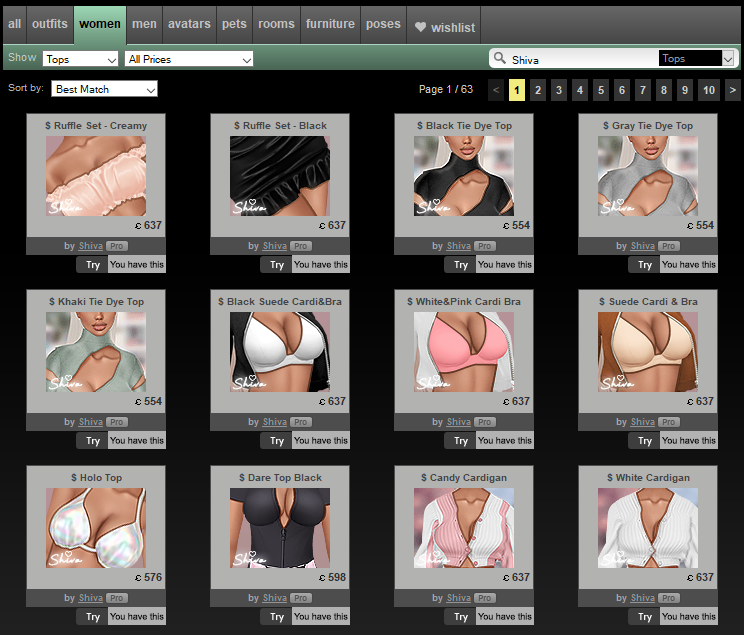
Catalog icons are the small icons (100×80 pixels in size) that you see while browsing the classic catalog and/or the desktop version. These images are very important as almost 50% of users still use an IMVU version (browser or desktop client) that is based on catalog icons to purchase goods. That is almost half of the buyers that will see the catalog icon first, and not the Next version of the product.
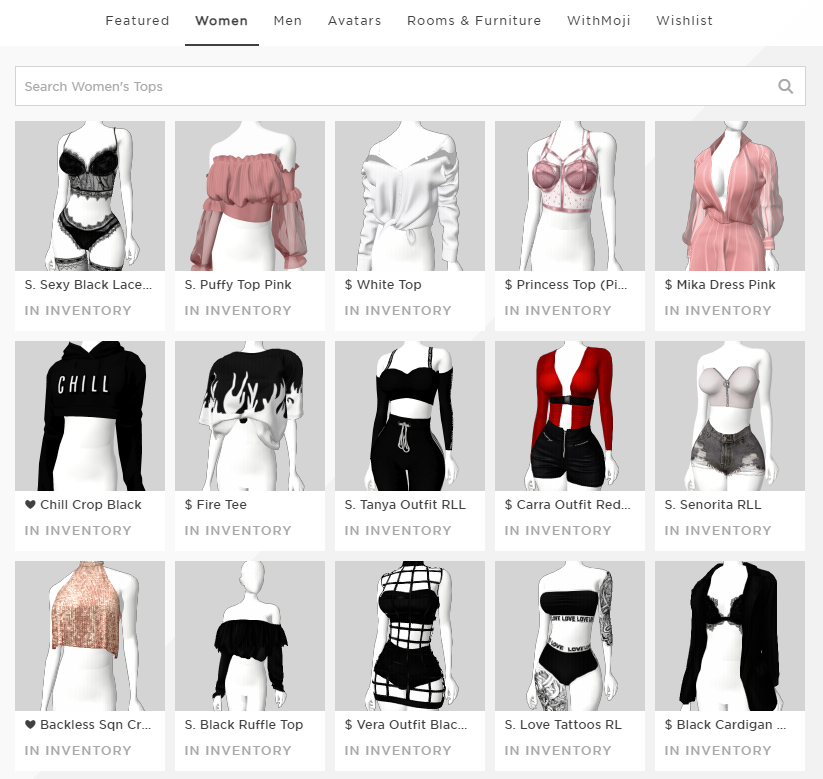
Note: As of August 2021, there are two versions of IMVU available for users. The one is the old, classic version of IMVU where users shop based on catalog icons (left picture) and the new version of IMVU, IMVU Next where users are shown a preview of the item on a standard, white avatar (right picture).
Note that catalog icons are still used in IMVU classic, Mac and PC versions and the classic IMVU catalog available on browsers.
Prepare your avatar
Choose the right items or take off items that cover the product you want to showcase
You want to showcase a specific product, therefore the avatar model should emphasize the product you want to sell.
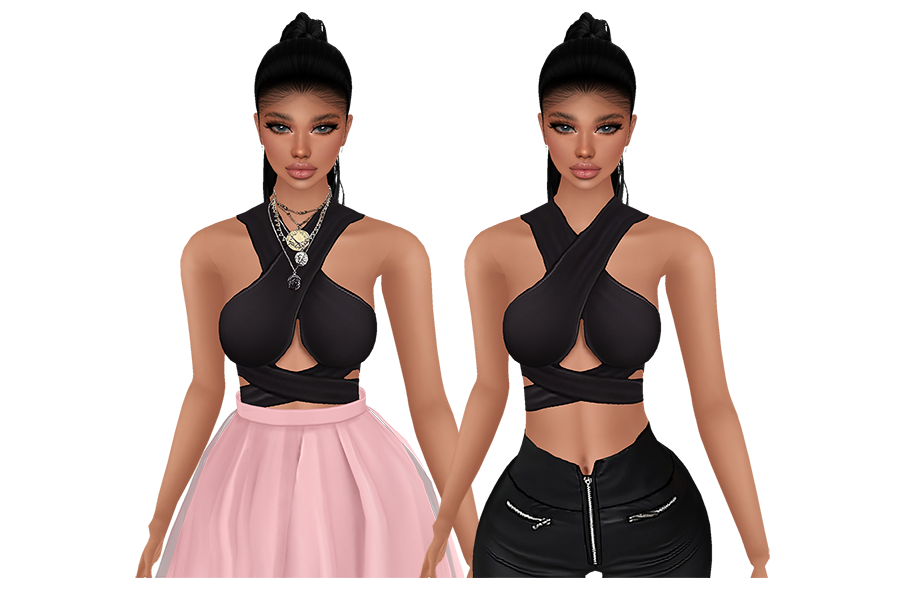
Below is an avatar dressed in a sweet way, nothing wrong with the outfit itself. However, the initial outfit we started with is not good to showcase the top that I want to add to the catalog.
The necklace is stunning, however, for taking a picture of the top, the necklace is ruining the composition because it’s covering a significant part of the top which should be the product standing out in the icon. On the other hand, the skirt is not appropriate because it cuts a bit from the top and it wouldn’t really match the top zooming in on just the top and bottom part of the body.
I removed the necklace and replaced the pants (second picture) to make sure I can put the focus on the top itself. The pants are there in case the catalog icon shows a bit more from the bottom part and I wanted something black to make it seem like part of the same story. The black pants are a good element to add to the composition of the top we want to showcase.
Add scalers or items that can enhance the product showcased
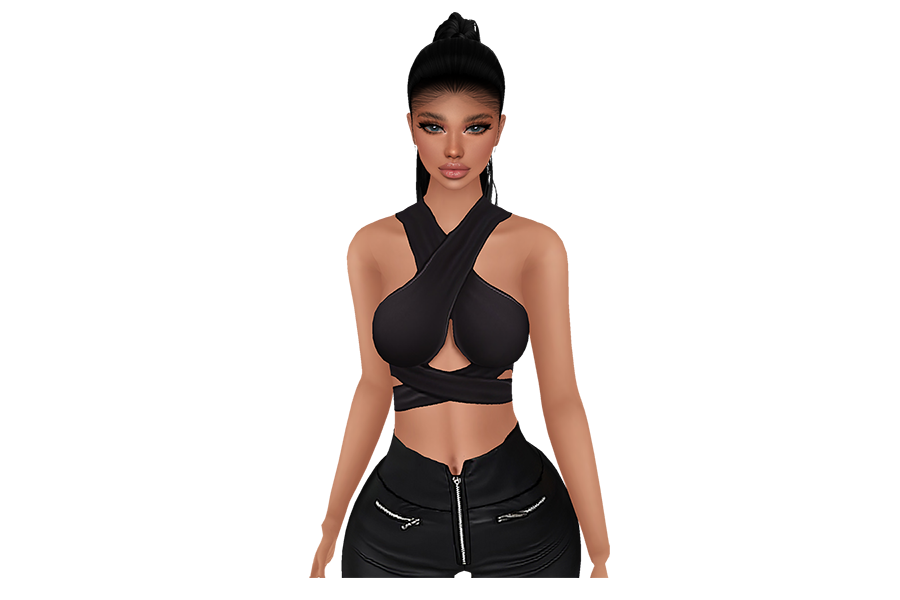
My top product is quite complex, as it has the black stripes going around the waist and around the neck. I could have added some arm bracelets or a small choker, but I decided not to. Instead, I added an 87% shoulder scaler to make the avatar look more feminine.
Choose a pose that can showcase the product clearly
In the example above, the pose used is already good enough to keep as a final pose to showcase the top. You want to make sure the product’s details can be seen as much as possible, and given that the final image we have to work with, 100×80 pixels, the pose is very important.
Below you can see some poses which are appropriate to showcase the product and some of which are not.
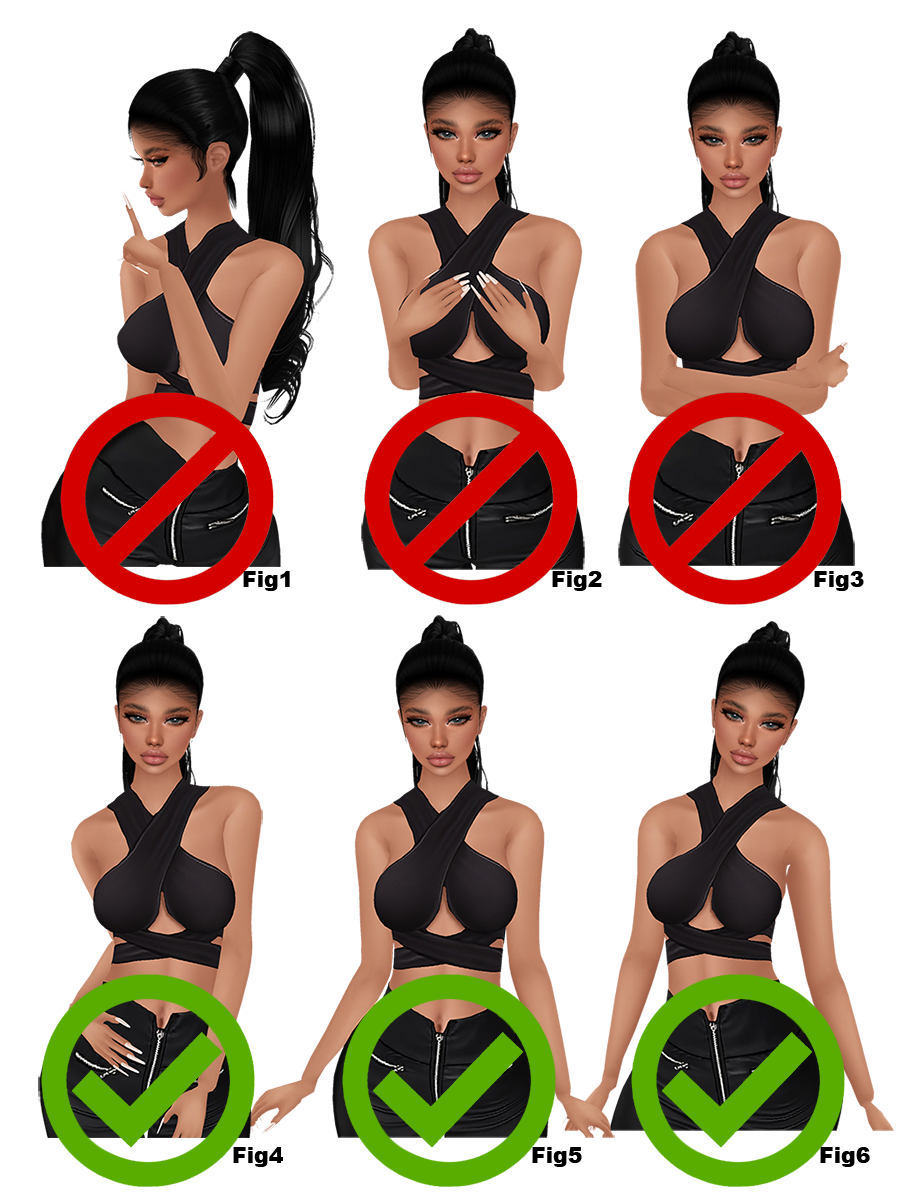
Figure 1 – the hand is covering a significant part of the top, thus many details are lost and the side pose does not offer any visual advantage to the product we want to showcase
Figure 2 – the hands begin to look like the important part of the composition, thus taking away the focus from the top itself
Figure 3 – the bottom part of the top is covered by hands, losing a part that makes the top interesting
Figures 4, 5, 6 – the product is clearly visible, there is nothing to obstruct the actual item showcased
Camera angle
Having the product in the center is not mandatory. You can be creative and work with various poses, but make sure you get an angle that makes the product the focus of your image and offers a clear visual representation of the item.
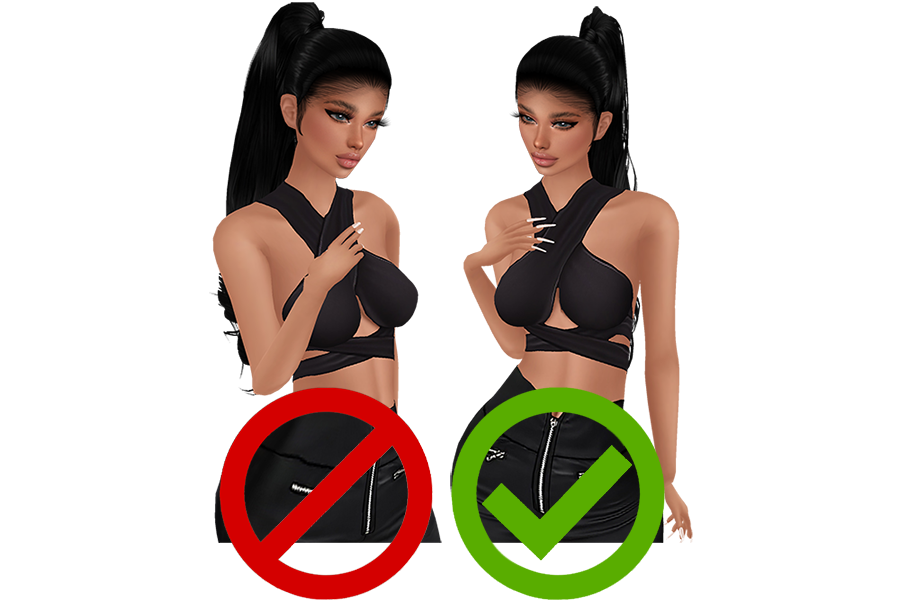
Notice how rotating the avatar pose can make an inappropriate picture look very flattering for the product. In the picture above, there was only one pose used and two different camera angles. Even though the hand is covering a tiny bit of the top, it does not interfere with the details of the product.
Once you master poses and camera angles, you can make a seemingly inappropriate pose look very fashionable.
Prepare the room
The room shadows play a significant role in how the final catalog icon looks like.

Notice how the shadow placement on the top changes, intensifies or softens. Looking at the arms is also good because it might add some realistic depth to the product, or even some boldness to make the avatar stand out.
A lot of creators prefer using rooms with no shadows because they can edit the items later, however, this is up to everyone how they would like to make the avatar look. There is no good or bad here, it’s just creativity.
Take the pictures
Once you are ready with how the avatar looks, now it’s time to take the pictures.
Do not take regular screenshots of the IMVU screen. You lose a lot of quality if you choose to screenshot or take a snip of your avatar/room.
IMVU has 2 picture features that allow 2048x2048px images to be taken of your avatar: *hiresnobg and *hiressnap
*hiresnobg
Type *hiresnobg in the IMVU chat to take a high resolution, no background image. It will only capture the avatar/s. It’s mostly used for outfits/accessories/poses.
*hiressnap
Type *hiressnap in the IMVU chat to take a high resolution snapshot image. It will capture both the avatar/s and the room&decor. It’s mostly used for capturing the room and decor.
Both commands save 2048×2048 pixels images on your desktop. They only capture a square shape of the middle part of the IMVU room window. Currently, there is no way to change the size of the image captured or the storage location.
In IMVU Studio, when using either command, the pictures are stored in C:\Users\%user%\Pictures\IMVU Photos where %user% is your computer username.
Don’t zoom in or out too much
Although the *hiresnobg and *hiressnap take large images, depending on the type of product you are showcasing, make sure the product is centered in the image you are about to take.
Importing and resizing the pictures
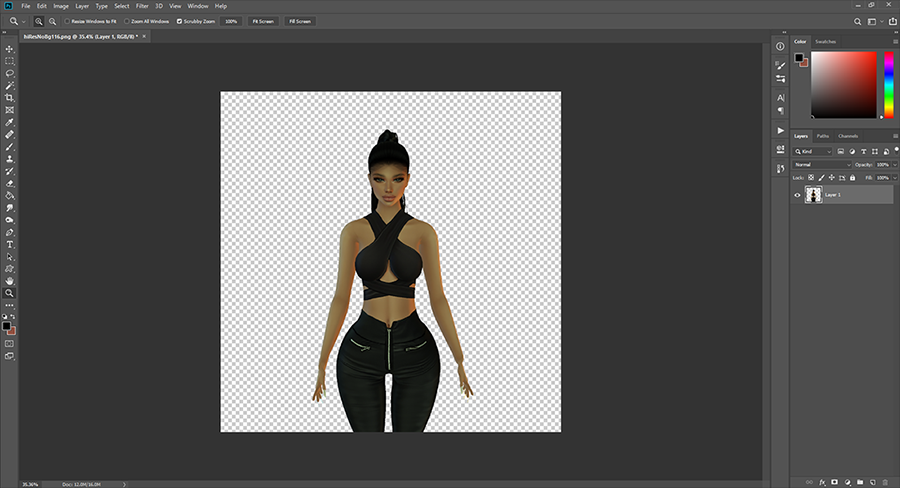
Import/open the images taken to your graphics program of choice. Most people use Photoshop or GIMP, as both offer graphic and design elements to build a final image. In my screenshots, I am using Photoshop.
Standard Image Resizing
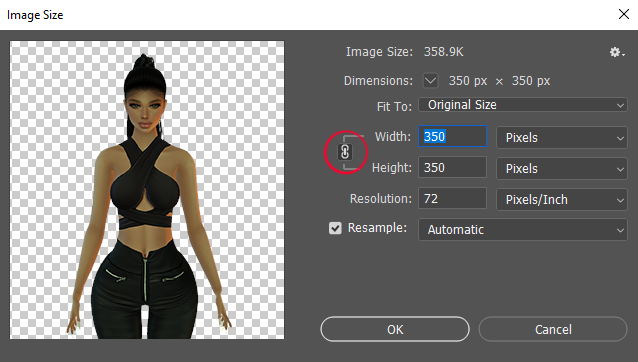
Next, we want to resize the image going to Image -> Image Size (Alt+Ctrl+I) to a smaller number. In this case, I have resized the image to 350×350.
Make sure the width and height are linked. This will make sure the image will keep its proportions and will look like an IMVU avatar.
Notes:
Never resize images to make them bigger. It will only make the image blurrier and we don’t want that. If you resized to a wrong size, go back a history state (Window -> History) by clicking on the upper history states:
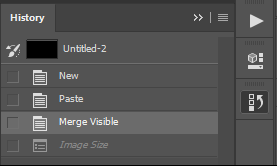
Always resize the images by making them smaller, never resize to make them bigger, even if you made them too small by mistake. If you resize too small, always go back the history state.
Smart Image Resizing
While in the original image size, right click the image layer and select “Convert to Smart Object“.
This will transform the layer into a resizable object, similar to vector elements.

With smart objects, you will be able to resize going small and big. To resize, go to Edit -> Transform -> Scale and play around. This function will allow you to resize to 1×1 pixels, then resize back to 2048×2048 without losing a single pixel of quality.
Icon placement
Knowing where to place the product object in the final composition is the last detail to keep in mind to make your catalog icons stand out. You need to be aware of proportions, other elements in your image (such as text, logo, etc.) and the overall aesthetics.
Do not resize the image to be incredibly small to lose all details. It’s no issue if part of the top ends up cropped. A cropped product will look significantly better than a full avatar trapped in a 100×80 body.
After resizing, make sure to make the final image 100×80 pixels.

Figure A – the bottom part of the top and the upper part can’t be seen, however, there is a lot of detail showing for the top. In many cases, a lot of cropping is going to occur to preserve details on the texture of the top; this image, however, should be part of a gif that shows a bit more of the upper and lower part, otherwise, for a better representation, a resize of at least 30 pixels would be better
Figure B – the details of the top can be seen and it allows for a bigger image, thus more details can be observed on the actual product; this is possible as the image is rotated to the side
Figure C – a simple representation that shows all the details needed
Figure D – it crops a bit from the neck area and shows a bit too much from the bottom area; it makes the image unclear as to what is the showcased product (is it the top? is it the bottom? is it both?)
Figure E – while the top is in full visual, the image is too small to show any details of the top
Figure F – while the size of the top is perfect, the placement is wrong, as it leaves too much empty space when it could have showcased a bit more details of the product
Be creative
Allow your imagination to play around with options, settings, rotations, and everything else!
You do not need to have an art degree to make a decent catalog icon, nor do you need to be highly educated in what constitutes beauty.
Naturally, people have the ability to appreciate beauty, symmetry, and other elements and features that make up the world and its enchanting look.
Explore the catalog, look at various creators and how they make their catalog icons, look online at products showcased for sale, anything can become an inspiring element or idea. Don’t be afraid to try out new styles and don’t put yourself down if the final icon is not what you had in mind. You will learn, you will grow, so make sure you allow yourself to make mistakes.
Happy creating. ♥